_We may earn revenue from the products available on this page and participate in affiliate programs. Learn more ›
_
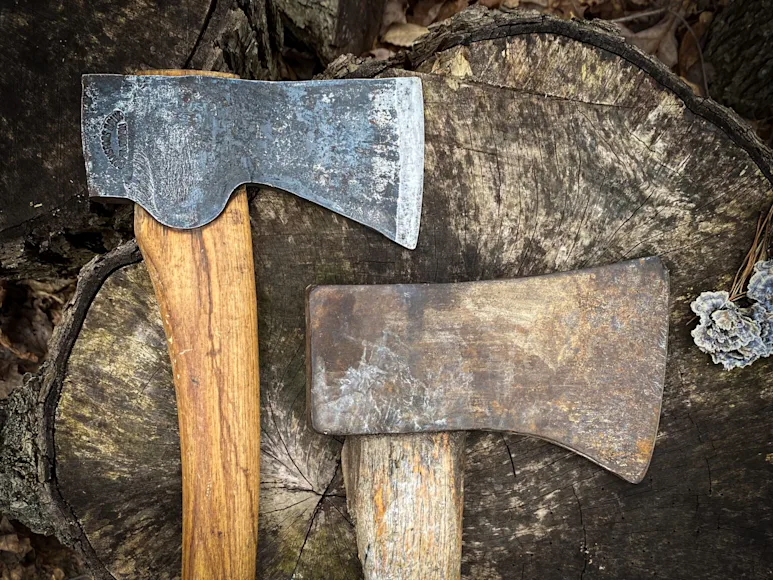
One of the sweetest sounds (and feelings) in the outdoors is when a sharpened axe splits cleanly through the wood you are cutting with it. Learning how to sharpen an axe is key to safe and efficient work, whether you are cutting wood for the fire or limbing trees for habitat management.
The best way to sharpen an axe is the way you feel comfortable doing it. Even though there are multiple ways to get an axe sharp, a few underlying principles are helpful. If you understand these principles of how to sharpen an axe, and make them your own with ample practice, you will have a highly effective tool to meet your needs.
Table of Contents
Axe Sharpening Gear
Getting Started in Sharpening an Axe
Axe Restoration
How to Preserve Your Axe
Final Thoughts
FAQs
Axe Sharpening Gear
A few tools will make your work easy and help you to effectively sharpen an axe:
:** Accidents happen, and gloves can help in the event there is a surprise slip.
:** This is a file closer to coarse than fine. You will need it to remove ample steel when needed.
:** On neglected axes, you can use these to remove light rust before sharpening.
:** Used to remove stubborn rust.
:** This should go everywhere your axe goes because it is easy to use in the field or at home on the workbench.
and Compound
:** A leather strop is a must for that last bit of fine-tuning.
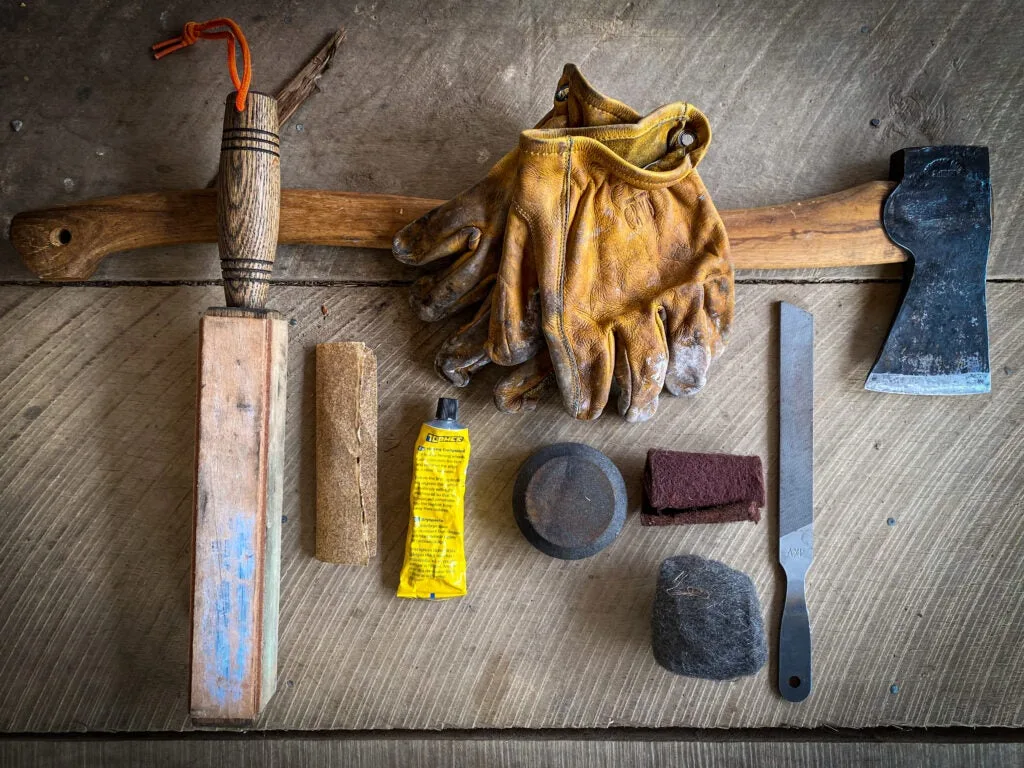
The author’s collection of axe sharpening tools. Craig Caudill Craig Caudill
Getting Started in Sharpening an Axe
Once you assemble those tools, it is time for learning how to sharpen an axe. I first want to focus on an axe that is regularly being used and not one that has been neglected. We will consider a neglected axe later.
There are three common reasons to sharpen an axe. I am going to cover each in this article:
Field expedient Touch-up
Regular Maintenance
Edge and Face Regrinding
1) Field Expedient Touch-Up
The best way to sharpen an axe in the field is to use a sharpening puck or stone. The one seen below is an ideal sharpening tool. It is easy to grip and has a coarse side for removing a lot of steel and a medium-grit side for finishing your cutting edge. You will only need the medium-grit side when an axe is appropriately used in the field. Medium grit grinding is used when an axe has become dull after using it for the tasks for which it was designed. You should expect to do this regularly in the field when using an axe.
Use the puck to remove the sharpening bevel on the axe. I prefer to use circular strokes on the bevel to remove the steel more uniformly along that edge. To sharpen the beveled edge evenly, use the same number of strokes on one side as the other. This isn’t easy to do at times, so there is a straightforward way to visualize the material that needs to be removed.
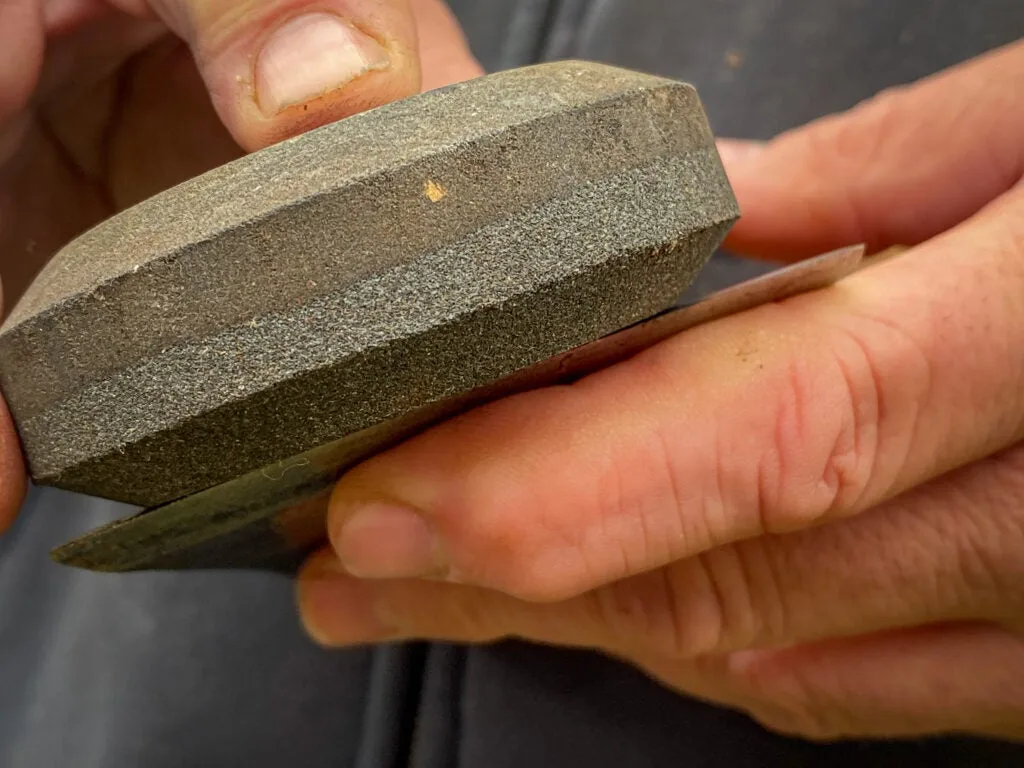
The author demonstrates how to use a sharpening puck on the beveled edge. Jennifer Caudill
Easy to See
Use a permanent marker to discolor the blade’s beveled edge (see photo). Color in as much of the beveled edge as possible. You will notice the coloring being removed as you start using your stone or puck to get a good axe edge. This makes it much easier to see the steel that has been removed.
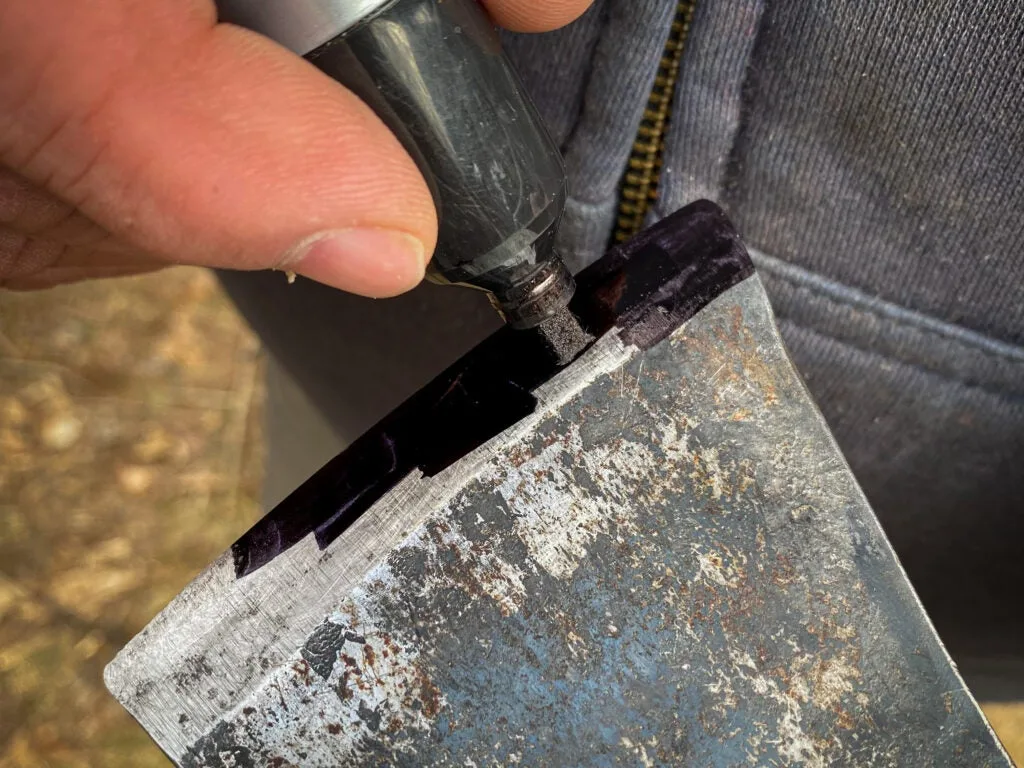
This permanent marker trick makes it easier to visualize the steel you are removing. Jennifer Caudill
Start by working the outermost edge of the cutting bevel. Once you have that done with the coarse-grit side of the stone, then use the medium coarse grit to refine the cutting edge. If you have a leather belt or an actual strop, a few strokes on leather will fine-tune it even further. Leather serves to polish the metal and remove any portion of a lasting burr. This makes for a cutting edge that is both crisp and sharp.
These steps will take care of your needs and get you back to work for field-expedient sharpening.
2) Regular Maintenance
No matter how well and safe you use your axe, you will eventually hit things you shouldn’t. You might find a piece of old barbed wire in a tree. You may cut through a log and hit a rock. This is to be expected on occasion and will cause nicks on the cutting edge of the blade. Regular maintenance will help take care of these problems and get you back to work.
When you see any nicks, you will need to file down the cutting edge until they are no longer present. If you have never done this, you will find it hard to do it the first time. But doing so will make the cutting edge more uniform provide a smooth curved transition from the upper corner of the cutting edge (called the toe) down to the lower corner (called the heel).
File Time
A bastard file is the best tool for this job. It takes out ample amounts of steel on each stroke. Most files are not designed to be used in a back-and-forth motion for material removal. To use your file correctly, push it to take off the metal, then reset and do it again. Take time to tap the file and remove captured steel from its grooves regularly. Otherwise, the file will be choked with debris and won’t work efficiently.
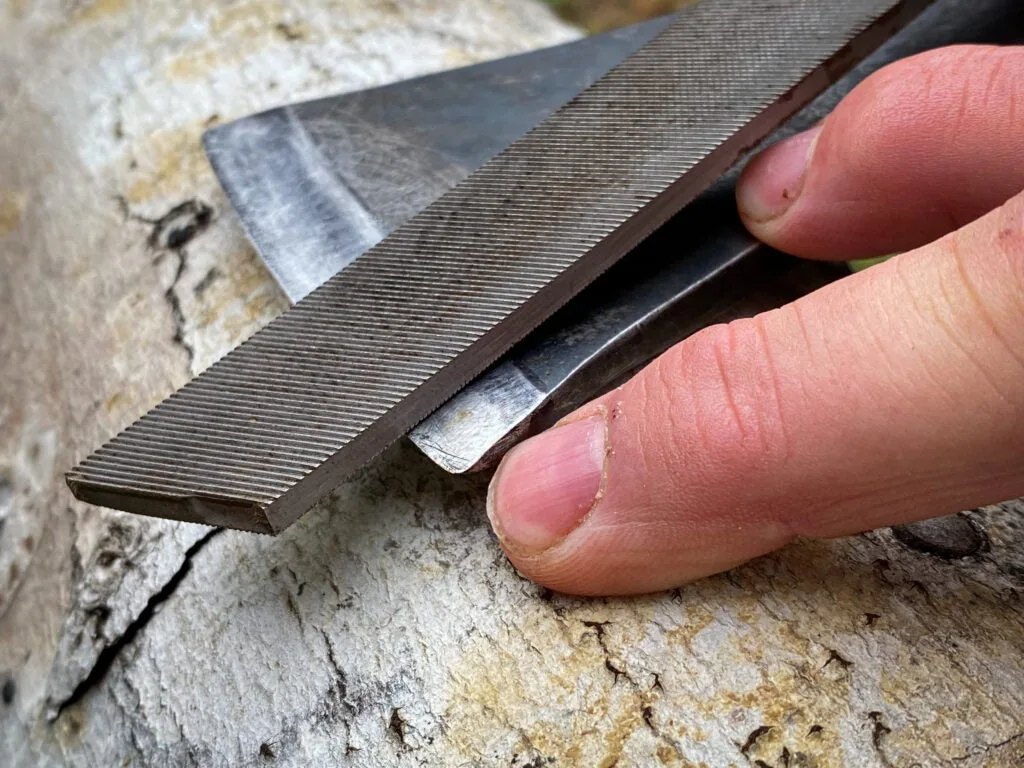
A bastard file will take away enough steel to file nicks out of your axe blade. Jennifer Caudill
Once you get the cutting edge from the toe to heel smooth, start the sharpening of the bevel edge with the file as well. There will be plenty of steel to remove here, and the file will make short work of it when done correctly. Always put your file at the same angle as the grind on the axe. Each axe has a beveled edge that is specific to that axe. There is no set amount for all axes. Once you get a feel for placing the file on the edge, it is easy to find it time and time again for proper sharpening.
Once you get the bevel edge close to where you need it, it is time to use your puck and leather again. Use the same number of strokes on each side with the coarse grit until it gets close to sharp. Then use the medium grit. Then on to the strop. Follow these steps in order and understand you’ll need ample patience to take your time and do it right. After that, it is easy to get your dinged-up axe back in action.
3) Edge and Face Regrinding
If you want to take a very neglected axe to a usable one, it will take a lot of sweat equity. Or you can use an axe grinder to shorten the amount of work. However, there is a significant chance that you can negatively affect the steel’s temper if you misuse the grinder on the axe.
When an axe head is made from hot steel, it is often quenched in a solution that does not allow the carbon to escape. This keeps all the atoms packed in tightly, making the axe head very hard. The side effect of hardening the steel is that it is often brittle. To combat this, it gets tempered. Tempering is the process of raising the temperature of the steel slowly to reduce the hardness a bit and eliminate most of the brittleness.
When placing an axe on the grinder, you can heat the steel enough to destroy the temper and make the head brittle again. You must be vigilant not to leave it on the grinder so long that the steel begins to change color, which indicates that the temper has been compromised. Therefore, only use a grinder if you have an axe head that has been so neglected that it is pitted from rust. But even then, it’s still best to use a bastard file and remove the material slowly to avoid any chance of a serious change in temperature that could end up altering the molecular structure of the steel.
Axe Restoration
You can alternatively use steel wool, coarse grit sandpaper, or a scrubbing pad to remove surface rust if it is not pitted. Feel free to work on the axe vigorously to remove the rust. You will notice that it may make scratches on the axe head as you are doing this. Once the rust is removed, use ever finer grit products to work the scratches out to have a smooth surface on the axe. It may seem insignificant, but the more polished an axe is, the better it will cut through wood. Don’t over-concern yourself with the edge when doing this. Once you remove all the rust on the neglected axe, you can then resharpen by following the procedures above to get the axe edge back to where it needs to be.
How to Preserve Your Axe
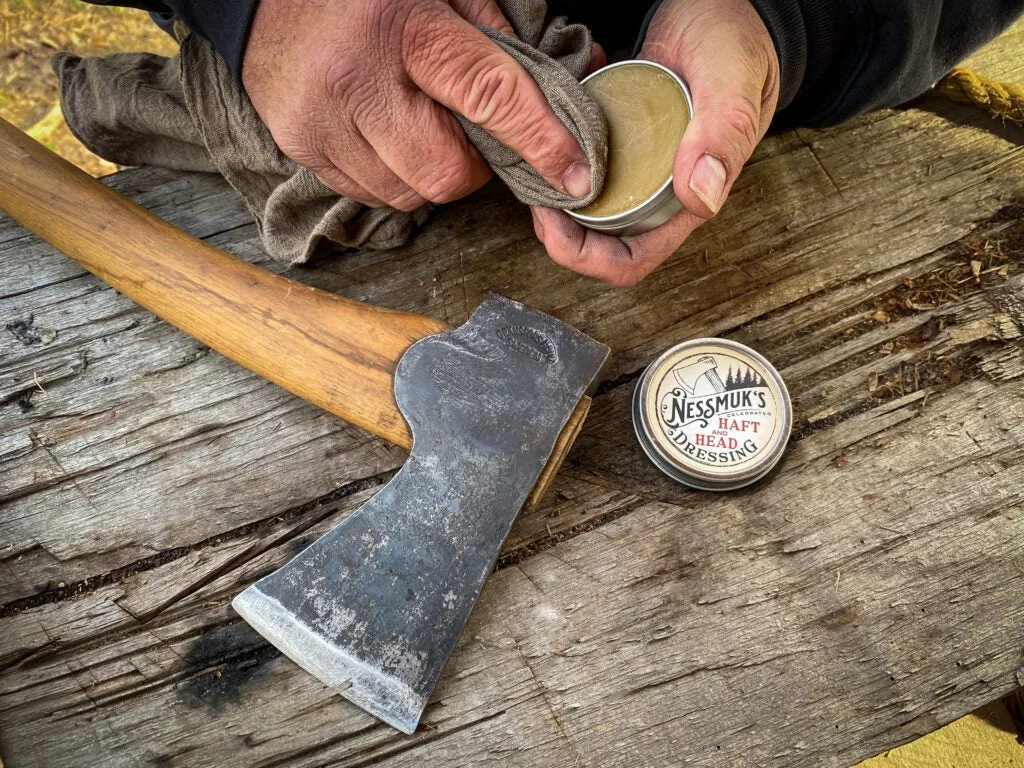
The last piece of the puzzle when learning how to sharpen an axe is to take time after use to clean and preserve it for subsequent use. This is an important and overlooked aspect of axe sharpening. I prefer to sharpen and preserve the steel and wood after use, rather than before the next use. I want that tool to be in the toolbox ready to go the next go around. If you follow these recommendations, it is much easier to do everything that I have discussed previously.
Craig Caudill
Craig Caudill
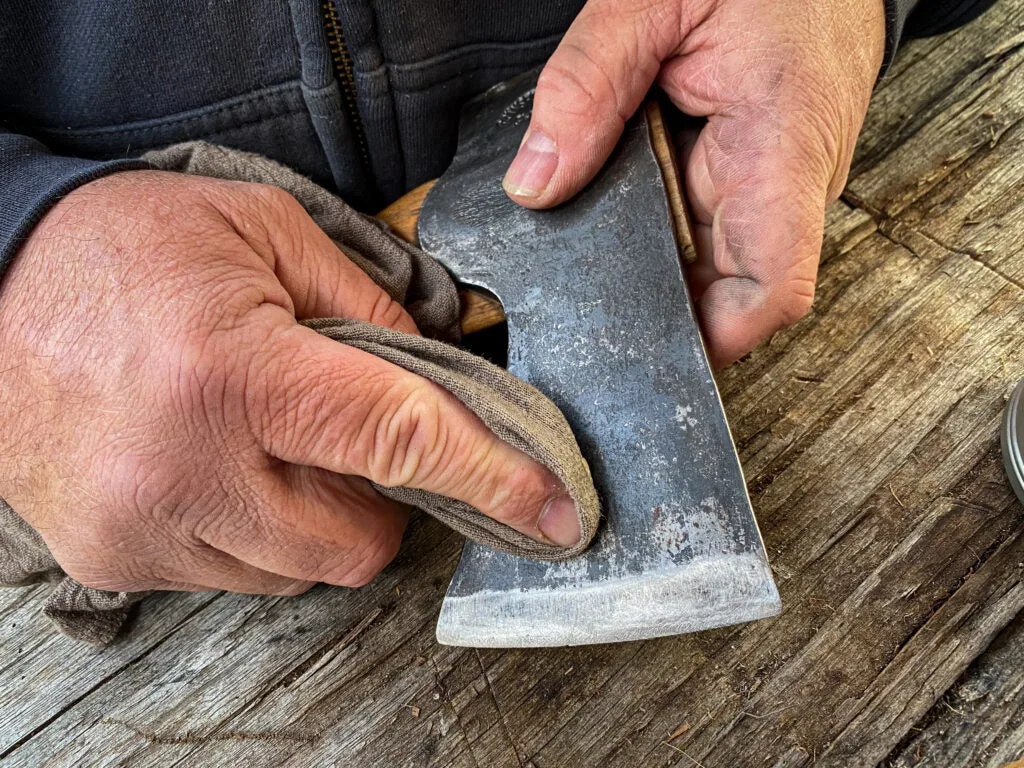
The first step in this process is to remove any solid debris with a rag, steel wool, or similar. I often do this by wiping it on my pants. Once that waste is removed, sharpen as described above. The last critical step is to rub some preservative (using Nessmuk’s Haft and Head Dressing
here) onto both the head and the handle. I prefer something that has a mixture of linseed oil and beeswax
. This allows me to protect both the head of the axe and the handle with the same product. Preserving the head and handle makes the axe a more comfortable and usable tool in hand.
Final Thoughts on How to Sharpen an Axe
Always keep in mind that a dull axe is a dangerous axe. The duller it is, the harder you need to swing it to make it cut. Learning how to sharpen an axe will allow you to cut properly and efficiently, and coupled with a strong swing, you’ll be a chopping machine. Keep your sharpening tools with you while you work, and you’ll avoid a dull axe. The axe will do the work for you, allowing you to swing softer and be safer while using it. You’ll have your fire going
in no time.
Axes are very forgiving in learning how to sharpen them. This means that you can make an error in this process, and it is relatively easy to fix. Get the right tools, be patient in using them, and you will be well on your way to a safe, effective, and efficient cutting axe.
FAQs
Q: Should an axe be razor sharp?
A sharp axe is an efficient and safe axe. The general answer here is yes, keep your axe as sharp as you can get it. If your axe is made for serious cutting—not just wood splitting—you should be able to get it sharp enough to shave with. That said, be patient and match the bevel of that axe, so you don’t get too extreme. The permanent marker trick is great for this.
Q: How can I sharpen my axe at home?
To sharpen your axe at home, you need only to follow the steps laid out in this piece. Use the technique needed for the current state of your axe—typically one of the three outlined here. For field touch ups, you only need a sharpening stone and a strop, so you can file it down wherever you find yourself. But if your axe has taken a nick (see the Regular Maintenance section), you’ll really want a work bench to sit down and do this work. To safely work on an axe, you’ll need to have it at a comfortable height and clamped down to keep it from moving while you work. But again, the work itself is rather simple, and you can follow the steps here.
Q: Can I use a knife sharpener on an axe?
An axe is a bladed tool just like a knife, so yes in theory. But you must consider the ways axes are different: they are bigger and more heavy duty. A fixed or adjustable angle knife sharpener wouldn’t be very practical for an axe. You’d need a bastard file to really work on any axe-sized nicks. However, you could use a whetstone for maintaining your axe’s cutting edge, as the same whetstone you use for a kitchen or hunting knife does the same job as a sharpening puck. (Though for an axe, a sharpening puck works much better with the size of an axe and ergonomics of sharpening.)
Continue Reading…
Check out our reviews and buyer’s guides of the best axes on the market.

