_We may earn revenue from the products available on this page and participate in affiliate programs. Learn more ›
_
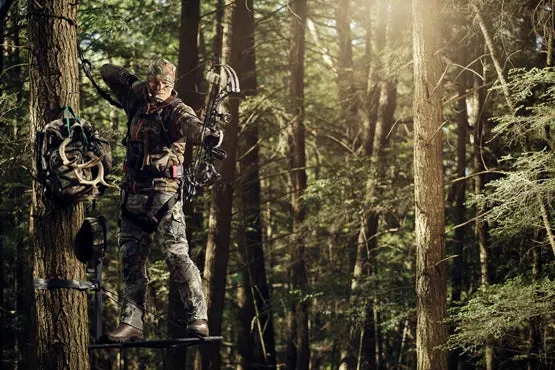
Of course bowhunting rules. It adds months to your hunting season. It challenges you to bring your A‑game. And success means getting heart-in-your-ears, can’t-hardly-breathe close to your quarry. But that’s not what we’re talking about here. We are talking about rules of thumb, basic tenets—plus a strongly held opinion or two—that form a foundation of knowledge to help you (1) find the bow that is exactly right for you, (2) shoot it like you’re a modern-day Howard Hill, and (3) slip into bow range of more game than ever before.
Below are 25 such rules, plus additional video rules. They’re not meant to compose a complete list, because there’s much more to know about bowhunting than can be said here. But these rules give you enough information to make 2012–2013 the best bow season of your life.

Get the right bow to shoot better. Field & Stream
You can kill game with a Bear Polar II. You can also listen to the Captain & Tennille on eight-track. If your compound bow is much more than 5 years old, it is obsolete. Here’s what you need to know to get the right new one.
Rule 1: Everything Is a Trade-off
A compound bow is a simple pulley-and-lever system. The energy you get out is proportional to what you put in. (Today’s bows are better in part because they are more efficient, meaning they give back a higher proportion.) As such, a faster bow is generally harder to draw. And some of the very things that make it fast can also make it harder to shoot well. It’s a give-and-take. Getting the bow that’s right for you means giving and taking wisely. —Dave Hurteau
Rule 2: Accuracy Is Paramount
Archers never tire of debating the lethality of various broadheads and the relative speed, smoothness, and quietness of different compound bows. None of it matters a hoot if you can’t hit what you’re aiming at. By the same token, with perfect accuracy you could kill deer with a sharpened oil dipstick shot from a washtub bass.
Accuracy matters most. Not a given bow’s accuracy (most are accurate enough in the right hands), but your accuracy with a given bow. As a rule, below-average to average shooters need a bow that’s more forgiving of operator error, which usually means something on the longer and heavier side (more stable and easier to hold on target) and on the slower side (easier to hold at full draw without creeping forward and apt to have a longer brace height). Good shooters, who don’t need as much forgiveness, can reasonably opt for something shorter, lighter, and faster. The trick is finding a bow that you can potentially shoot accurately, and then shooting it until you do. —D.H.
Rule 3: Don’t Give Up Accuracy for Speed
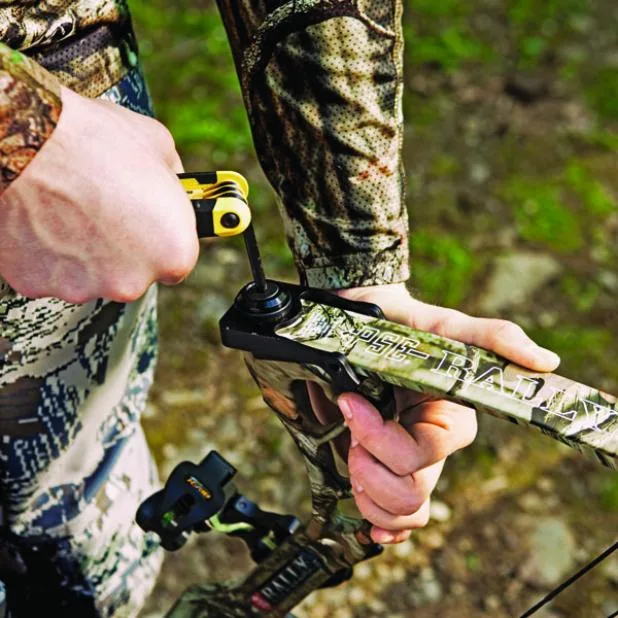
Never trade accuracy for speed. Peter Yang
You can set up a bow to maximize one or the other. Unless you are such a good shot that you can give up a little accuracy and still be hell on wheels in the deer woods, favor accuracy.
Two examples:
[A] Cranking up your bow’s draw weight increases arrow speed. But if you shoot better with it turned down—turn it down.[B] Some hunters shoot a draw length that is too long but don’t want to give up any speed by shortening it. Just give it up. Too long a draw puts too much of your face against the string, can make it difficult to maintain a consistent anchor point, and can cause you to lock your bow arm out straight, as well as creep forward with your string arm. It’s not worth it. Not sure if your draw is too long? See a good bow-shop pro. —D.H.
Rule 4: Beware the Short-and-Light Craze
As stated, longer, heavier bows are easier to shoot accurately. (That’s why competition models go 40-plus inches.) The hype is that an ultralight, supershort bow is easier to carry and maneuver. That’s fine, I suppose, but I don’t understand why a 6-pound rifle is a wand and a 41⁄2-pound bow is an anchor. And I don’t know any archer who has ever said “I would have killed that deer if my bow were 2 inches shorter.” —D.H.
Except: When You Find a Gem
There are a handful of very short, very light bows that break this rule and are real shooters. (One, from my recent tests, is the new Mathews Heli-M). If you find one that suits you, God bless.
Rule 5: Faster Is Better
If you can shoot it accurately—a big if (see Rules 1, 2, and 3)—a faster bow has major advantages. All things being equal, it shoots a flatter arrow, making exact range estimation less critical. And if it spits the average hunting arrow of around 400 grains out at an honest 280 fps or better, then it should let you shoot one pin out to 30 yards without having to hold outside the vitals, which simplifies things enormously in the field. But the biggest advantage to a blazing bow, in my opinion, is that it lets you shoot a heavier arrow sporting a heavier head without giving up too much in trajectory. This adds up to more momentum and better penetration, neither of which makes any difference if you make a perfect shot. But if you screw up, they can turn an otherwise nonlethal shot into a filled tag. —D.H.
Rule 6: Accessorize for Accuracy
No matter what your skill level, the right accessories can improve your shooting. This Hoyt Vector Turbo (35-inch axle-to-axle, 4.2 pounds, 340 fps IBO, 6-inch brace height) is a bow I use both in the field and on the 3-D course. Here’s how I set it up.
Except: When It Costs You Venison
Just don’t let sexy IBO claims blind you to the fact that a faster bow demands better shooting form. Also, shooting a very light arrow and head will give you greater speed—but less momentum and penetration. If you like venison, that is a bad trade-off.
Use these tips to learn how to shoot your bow better this season. Field & Stream
The advantages to shooting better are exponential. You hit more stuff, your confidence grows, you hit still more stuff. And if a faster bow is what you crave, better shooting fundamentals will help you handle it.
Rule 7: Shorten Your Release
If you trip your release trigger with the tip of an extended index finger, quit it. This tends to make you slap at the thing. Instead, shorten your release aid so that at full draw you are able to curl your index finger around the trigger at about the middle joint. This makes it easier to squeeze the trigger smoothly and with better control. —D.H.
Rule 8: Float the Pin and Squeeze
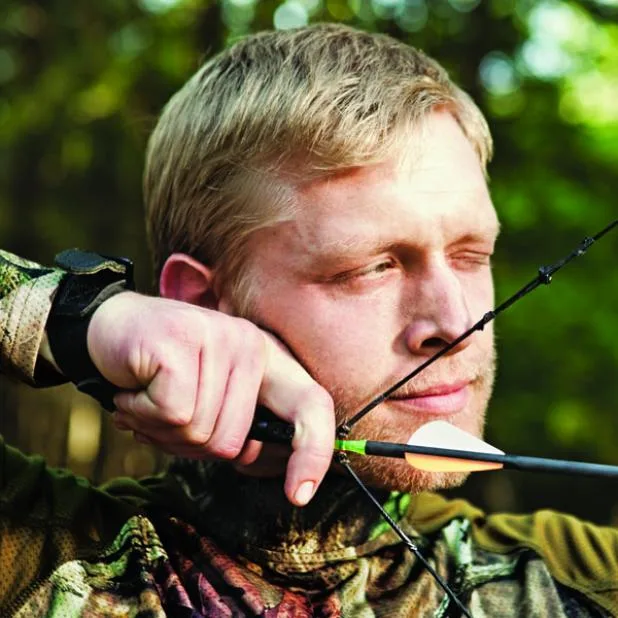
Remember to float the pin and squeeze on every shot. Peter Yang
You wouldn’t think that letting your sight pin float on, off, and around the bull as you squeeze the trigger could possibly tighten your groups. But it does, like magic. So stop trying to hold the pin perfectly still on your mark, which is often not possible anyway. Instead, let it float and squeeze—slow and steady. —D.H.
Rule 9: Watch the Arrow
Eyeing the shaft all the way to the target through the sight-pin bracket during practice sessions promotes better follow-through and keeps you from dropping your bow arm. —Will Brantley
Rule 10: Shoot for Something
A friendly gamble helps teach you to steel your nerves while at full draw. Bet a quarter per arrow with your buddies during backyard practice and let the smack talk flow freely. —W.B.
Rule 11: Practice in Low Light
Most bow shots at mature whitetail bucks happen during either the first or the final ticks of daylight, when sight pins dim and your peep sight seems to shrink. So devote some practice time to the opening and closing minutes of legal light in your area to prep for this crunch time and to learn your maximum effective range in low light. And count on it being tighter than you expect. —Scott Bestul
Except: If It’s Not Safe
You live next door to the Dawn-to-Dusk Daycare Center, for example. Seriously, be careful.
Rule 12: Form is Everything
Good form is the reason why Sam Snead has over 300 top-10 finishes and why Mariano Rivera may pitch until he’s 50. It’s also what will get you to shoot your bow better. So practice until you can do it in your sleep. Here are the basics to good form.
Rule 13: Check Your Bubble Level
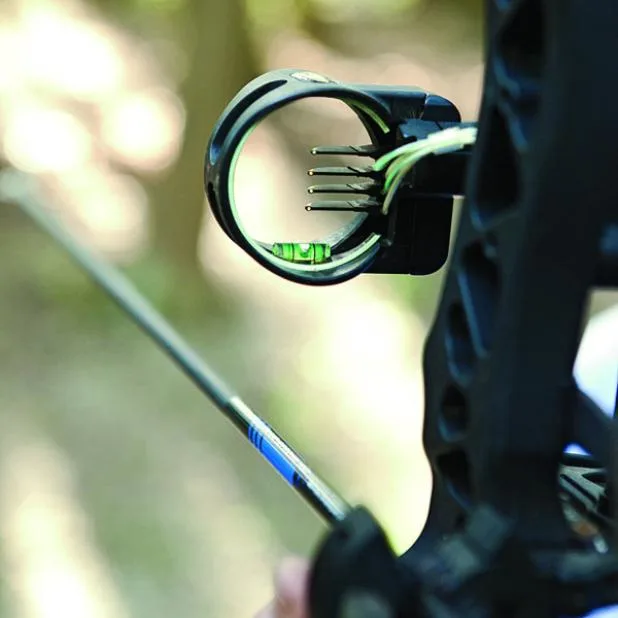
Make sure to check your bubble level before you shoot. Peter Yang
The bubble level on your sight reveals cant and torque, both of which are accuracy killers. Always use it on the practice range because it forms good habits. Glance at the bubble as part of your pre-shot routine, adjust the bow as necessary, and watch your groups shrink. —W.B.
Except: On Short Field Shots
In the field you only need to use it for shots beyond 30 yards and for shooting on a steep incline. Otherwise, half-a-bubble off won’t make much difference.
Rule 14: Match the Arrow Spine
Two bows with the same draw length and weight may require different arrow spines for optimum accuracy. Any reputable bow shop will have access to a spine calculator. But if you’re buying online, make sure you speak with a tech to match the spine with your bow’s specs. —W.B.
Rule 15: Make the First Shot Count
Repetitive practice is fine for perfecting form. But few bucks will give you a second shot, let alone a fifth. About a month prior to the opener, start each morning by shooting a single, broadhead-tipped hunting arrow. Pick a distance, visualize a hunting scenario, and shoot. Then walk away. Increase the difficulty as the season nears, and you’ll be ready for that make-or-break shot. —S.B.
Rule 16: Go Long: The 100-Yard Shot
Hitting a target at 100 yards with a bow is not so difficult as you think. Try it. Not only does long-range practice make shots at hunting ranges seem like gimmes; it also magnifies subtle mistakes in shooting form. If you mess up your form at 30, you may still be in the kill zone. If you mess up at 100, you’ll miss the whole damn target and lose a $12 arrow. This forces you to bear down and shoot well.
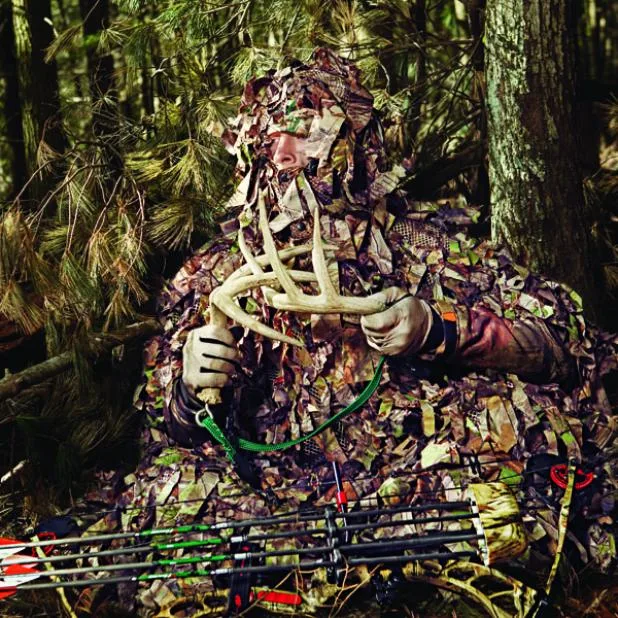
Practice all your bowhunting skills before the season starts. Peter Yang
Rule 17: Go to the Ground
You don’t have to climb a tree to bowhunt. A natural ground blind works great in the deer woods, elk timber, or pronghorn prairie; the key is having good back cover to hide your silhouette. Or you can inch through the woods wearing a gillie suit, stopping for periods at likely spots. A small stool helps me sit more comfortably and makes it easier to draw. Some guys just stand behind a tree. Either way, wait for the animal to walk past you before drawing and making a quartering-away shot. —S.B.
Rule 18: Master the Wind
Use soaps and sprays if you want. Can’t hurt. But to get close to deer time and again, you must master the wind. You know the basics; try these advanced moves.
Thermal Shifts
Thermals are supposed to rise in the morning, fall in the evening. But it’s not that simple. They may not actually begin rising, for example, until well after daylight, making an uphill stand dead wrong. So prep stands above and below a sidehill trail or feeding bench, and quickly, quietly switch the minute the thermals shift.
The No-Bust Setup
You can smell like a carpet after a frat party but if a buck can’t walk into your scent stream, you won’t get busted. Bowhunters should always be looking for the no-bust setup. Hang your set at the end of a ridge, say, and only hunt it when the wind blows your funk out above the valley. Or stick your stand tight to an obstruction—a steep bank, a lakeshore—that prevents deer from approaching or circling downwind.
The Almost Wrong Setup
One of the deadliest big-buck setups is almost dead wrong. The idea is to set up so that a breeze is blowing in the general direction of a buck’s approach enough to make him feel safe—but it’s actually quartering just enough that he can’t quite get you. —S.B.
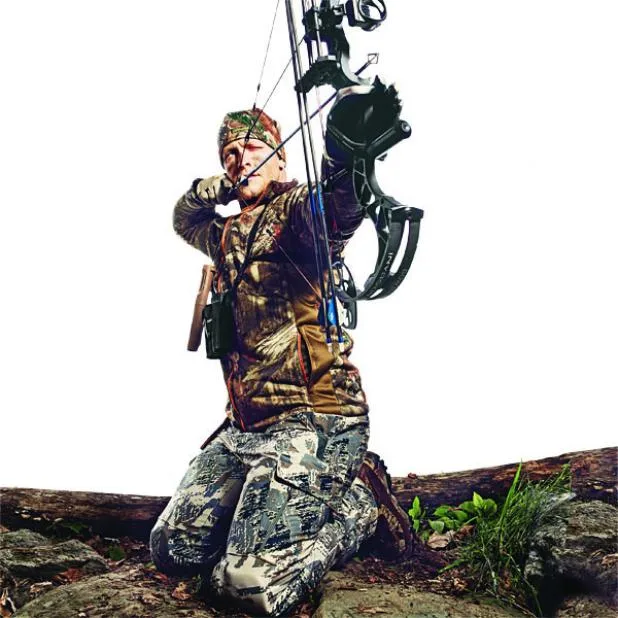
Practice shooting your bow from your knees. Peter Yang
Rule 19: Shoot From Your Knees
This is a vital skill for anyone who stalks or still-hunts with a bow. Kneeling hides the human shape; it allows you to hunker out of sight when an animal is approaching and then slowly rise and draw your bow when the angle is right for a shot. It’s a quick and simple position to get into while on the move, and because its vertical posture is similar to standing, it is easy to maintain good form and make a good shot. —W.B.
Rule 20: Back Off
When you find red-hot buck sign, it’s tempting to hang your stand right over it. But it’s a classic mistake. Instead, figure out the direction from which deer will approach and take 12 to 20 steps to the side that puts you downwind or crosswind. How far depends on how confident you are in your shooting. This gets you out of the deer’s line of sight and gives you a flatter shot angle at a deer that’s more apt to be broadside. —W.B.
Rule 21: Make Some Noise
You will call and rattle more bucks into bow range if you remember these three things:
[A] When blind calling, start quietly in case there’s a deer nearby, but then call loud and often. Long periods of silence don’t make sense if you have no idea when a buck will move into earshot.
[B] When calling to a specific animal, read its body language. If a buck hears you but tucks his tail or angles away, let up. If he lifts his head and listens, keep calling. If he turns and faces you, bristles up, or lays his ears back, get aggressive.
[C] It’s always best to call to a buck before he has started to leave. But don’t let him walk out of your life without saying something. Hit him with a grunt, a bleat, a snort-wheeze. It won’t work most of the time. But once in a while, it will turn him—into burger. —D.H.
Rule 22: Stake a Fake
Don’t make the mistake of thinking decoys are just for the rut, use these four setups all season long.
Except: When it Spooks Bucks
Including: (a) when you can’t put the fake in a highly visible area (bucks don’t like to be surprised by decoys); (b) when you know you are dealing with a shy, nonconfrontational buck; and (c) when your area has too few bucks to risk running one off by intimidating it with a buck decoy.
Rule 23: Kill Does and Cows
Want to be a better deer, elk, or pronghorn killer? Kill more deer, elk, and pronghorns. Shoot as many does and cows as you legally can, and donate what you can’t eat. This teaches you how to behave during the adrenaline-charged moments when game is close—when to draw, when to stop an animal, how to pick a lethal shot angle and aiming point, and how to follow a blood trail. —W.B.
Rule 24: Get a Friend
Bowhunters typically go solo, but a partner can be a big help. Three prime examples:
Tag-Team Rattling
Bucks tend to circle downwind of the sound of crashing horns. So when rattling, post a buddy quartering downwind of you. If the buck bombs straight in, you get the shot. If he pulls the circle maneuver, your partner can stop him short.
Elk-Deke Duo
When a bull elk approaches a call but can’t spot another elk, he’ll often hang up out of bow range. So have the caller hide behind a collapsible silhouette decoy, maneuvering it to keep it broadside and visible to the elk. The shooter then sets up to intercept the incoming bull.
Flag for a Friend
Stalking a bedded buck in open country is a lot easier if you have a flagger, who remains planted where you first spotted the buck, keeping track of his location with binoculars. As the stalker loops wide to approach the bedded buck, he uses his own glasses to follow the flagman’s signals right to the deer. —S.B.
Rule 25: Keep Improving
Never forget that you can always be a better bowhunter tomorrow than you are today.
An Olympic Archer’s Advice on Improving Your Shot
Olympic archer Rod White has a gold medal (1996), a bronze medal (2000), and a wall full of trophy whitetails. So when it comes to slinging arrows, you might assume he’s unusually gifted. “Nah,” says the affable Iowan. “Shooting a bow well is actually very easy. I can teach the proper form to almost anyone in minutes. Beyond that, it’s all desire and practice.” We’re guessing you desire to never miss a whitetail, so here’s White’s crash course on shooting form, plus four drills you can practice at home.
The Technique
Proper shooting form yields consistent arrow flight, which translates into accuracy. To achieve proper form, imagine looking down at yourself in shooting mode. The target lies north on an imaginary compass. Your body faces east. Your left arm (if you’re right-handed) points north and holds the bow straight out. As you draw, you move your right elbow south until you reach full draw and the bow hits its back wall.
From here, your right elbow and right shoulder will continue to move, but now they’re heading west, toward your spine. “Most people call this ‘back tension,'” White says, “but I call it back motion, because your elbow and shoulder blade are moving toward the spine. The release finger is held firm, like a hook, and as you continue moving your right elbow toward your spine, that hook engages the release and the arrow is shot.”
This system works so well, according to White, because it places all the work on large muscle groups (arm, shoulder, back) and none on small muscle groups (hand, wrist, trigger finger). “Typically, archers screw up in one of two ways,” White says. “They try to hold the pin steady on the target by moving the wrist or hand of their bow arm, or they try to squeeze the release trigger with their finger. If these small muscle groups get control, they immediately sabotage the large muscle groups and the arrow is off line.”
When White practices, he focuses only on perfect form. “Learn that and accuracy will take care of itself.”
The Drills
Take the sight off your bow. Stand 10 to 15 feet in front of a hay bale without a target on it. Shoot a dozen arrows into the bale, focusing only on proper form and not on where your arrows hit. Repeat for three to four sessions.
Install the sight. Stand 10 to 15 feet from the same targetless bale. Pick an imaginary spot to shoot at. Don’t try to hold the sight pin dead still on the spot; rather, let the pin “float” over it. Shoot a dozen arrows this way and repeat for three or four sessions.
Have a friend stand behind you, watching carefully. Now shoot several arrows with your shirt off (women can wear a sports bra). Your buddy should see the shoulder blade of your release arm moving toward your spine after you hit full draw.
Once you’ve mastered proper form, begin shooting at a 3-D animal target. Ignore any marked bull’s-eyes or vital zones. Decide on an acceptable “kill” area and strive to put your shots within it. Concentrate on form and let your sight pin float on the kill zone; your arrows will follow.

