A good steak, roast, or stew will always have its place in the kitchen. But as you’re about to learn, few foods are more satisfying to make and eat than hunks of meat that you’ve cured with these two simple ingredients.
We’re going to use a word in this story that you’d normally hear in expensive French bistros, not hunting camp. We don’t mean to sound obnoxious or snobby–there’s just no way around it when you’re talking about this kind of food: charcuterie.
Now, don’t let the fancy term mislead you. You already know this delicious, rustic food: summer sausage, deer sticks, venison kielbasa. And don’t let the complicated recipes intimidate you, because chances are you’ve already made jerky, possibly the oldest form of charcuterie. What we’re teaching you are the skills you need to do this yourself and not depend on your deer processor.
There’s no doubt that charcuterie is a serious undertaking. You need to be organized. You need to be precise. And you need to be patient, since the work you put in today in the kitchen might not be ready to eat for another month–or longer. But it’s worth the wait. Not only will you get to share and enjoy some of the best-tasting wild game of your life, but preserving wild game demands so much care and craft that it’s just about the most honest trophy in hunting.
While this is not a definitive guide, the four recipes we’ve chosen feature the techniques–salting and smoking–that form the foundation of charcuterie. We’ve also rated the recipes by difficulty, so unless you’re an old pro at this, save the dry-cured sausage shown here until you’ve had some practice at the others. You’ll also find some tips to help you get started and transform your kitchen into charcuterie central, but really the best advice we can offer is simply to have fun, and take your time.
Dry-cured sausage
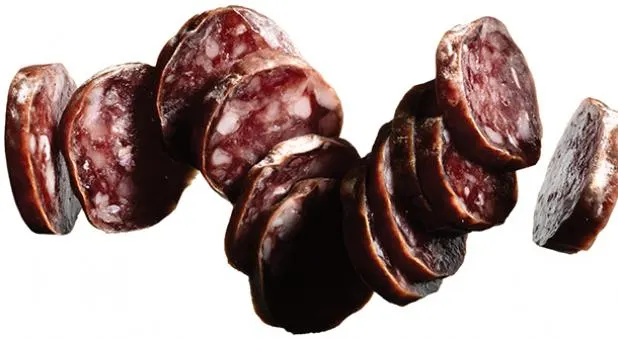
While the venison terrine recipe is actually a little more challenging to prepare, this recipe is probably the most difficult of the bunch because of the conditions you must create to cure the meat properly and safely. Unlike curing a whole muscle, such as a duck breast or deer loin, which is more forgiving as it cures, sausages need to be cured in a temperature- and humidity-controlled environment. We’ve included instructions on how to make your own curing chamber at home (see below). Beyond that, the hardest part of this recipe is the patience required before you can enjoy your first slice. –C.K.
Ingredients-4 lb. wild boar or venison trimmings, cut into cubes-1 tsp. Insta Cure No. 2-1½ oz. kosher salt-6 garlic cloves, minced-4 tsp. coarse black pepper-½ tsp. dried thyme-1 lb. pork fatback, finely diced-¼ cup very cold red wine-Hog casings, soaked for 30 minutes in cold water
Directions1. Mix the meat thoroughly with the Insta Cure, salt, garlic, pepper, and thyme, and grind through the medium plate of a meat grinder. Spread the mixture out on a baking sheet and freeze for 30 minutes.2. In a stand mixer with the paddle attachment, mix the ground meat with the fatback for about a minute on medium speed, slowly adding the red wine. Mix for about another minute, until the mixture is tacky.3. Cook a small patty of the sausage, taste, and adjust the seasonings, if needed. Stuff the mixture into the casings, making 16-inch loops, and tie the two ends together with string.4. Hang the sausages in the curing chamber, ideally at 60 degrees with 60 percent humidity, until firm and dry, for 4 to 5 weeks. Mold may form on the outside of the sausage. Fuzzy or greenish mold is bad. Throw out your sausage if this develops. If it smells off, or if it is mushy or not dried through, do not eat it. [We encourage you to read more at the National Center for Home Food Preservation (nchfp.uga.edu) regarding the safety of making sausage at home.] At the end of the drying phase, the sausage is ready or can be wrapped and refrigerated for up to 4 months. Recipe adapted from Afield: A Chef’s Guide to Preparing and Cooking Wild Game and Fish
by Jesse Griffiths.
Charcuterie essentials-Curing SaltCharcuterie recipes often call for a touch of pink curing salt, such as Insta Cure No. 1 (for cooked and smoked meats) or Insta Cure No. 2 (for dry-cured meats), to kill bacteria. The salt is toxic if ingested directly. You can find curing salts at specialty stores, oron Amazon.
-Sausage CasingMost butcher shops will either sell or order fresh hog casings. Remember to soak the casings in water for at least 30 minutes before you stuff them.
-FatbackA layer of fat from the pig’s back, fatback is essential in just about every wild-game sausage recipe and can be preordered from your butcher.
-Meat Grinder-Sausage StufferInvest in a unit that’ll last you many seasons. We like the Cabela’s Heavy-Duty Grinder ($120; cabelas.com).
-Digital ScaleAs you explore more charcuterie recipes, you’ll find that the ingredients are often listed by weight, since that’s the most accurate form of measuring. –C.K.
Secret ChamberFor centuries, European hunters have cured sausages and whole cuts of meat by hanging them in damp caves, stone-walled cellars, and other dark confines that were appropriately cool and humid. For the rest of us, a small refrigerator–just like the one you had in your college dorm–can be adapted into a serviceable chamber for curing meat.
Get StartedLook for refrigerator models in the 3.2 to 4.5 cubic foot range, which is tall enough to hang and cure sausages. Be sure the fridge features an adjustable thermostat. You’ll also need an inexpensive combination hygrometer-thermometer unit in order to monitor humidity and temperature, along with four to six 1-inch cup-style screw hooks and a small tray that will fit in the bottom of the refrigerator.
Hook UpUsing a 3⁄32-inch drill bit, drill a pilot hole in the ceiling of the refrigerator (or the plastic tray below the freezer) for each screw hook, spacing the holes 2 inches apart. Install the screw hooks, which are where you’ll hang the sausages.
Warm UpWith double-sided tape, stick the hygrometer-thermometer to the inside of the door or the back interior wall. Adjust the thermostat to its highest (warmest) setting. This should get the temperature to around the 55- to 60-degree mark.
Tray CoolAs for the humidity, fill the small tray with kosher salt and add distilled water until the salt is fully saturated. This mixture will release or absorb moisture accordingly to maintain a relative humidity of 60 to 70 percent, creating the perfect place to dry-cure your meat–no spelunking required. –D.D.
Smoked Ham

Smoked Ham Photos by Levi Brown, Food styling by Roscoe Betsill
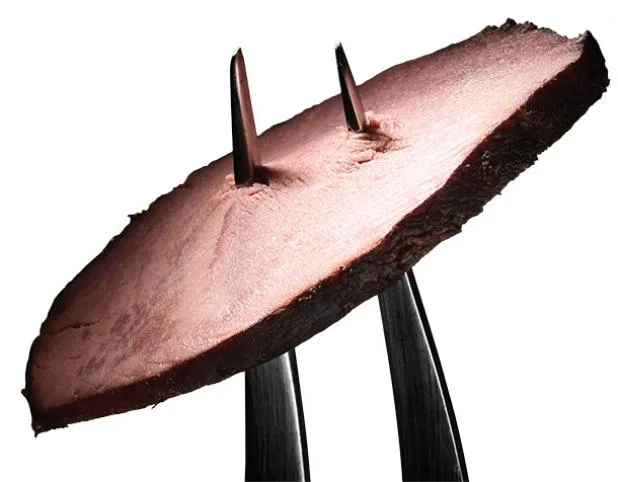
A deer’s rear quarter typically ends up in a jumble of roasts and steaks that often find their way to the bottom of the freezer. Which is a shame, because a smoke-cured venison ham is a beautiful thing, and the end result is a prime cut that will be gone long before those random roasts get used up. Sweet, salty, smoky, and delicious–the ham can be served hot with scalloped potatoes, sandwiched between slices of crusty bread, or whisked into an omelet the next day. –D.D.
Ingredients-Large bone-in venison roast-1 gallon ice-cold water-1½ Tbsp. Morton’s Tender Quick per pound of meat-2 cups brown sugar-¼ cup pickling spices
DirectionsThe Brining1. Trim as much silverskin and fat from the venison as possible. Weigh the roast to determine the amount of Tender Quick you’ll need, as well as the length of the brining process.2. In a large food-safe tub, mix 1 gallon of cold water with the Tender Quick, brown sugar, and pickling spices. Whisk thoroughly until the Tender Quick and brown sugar are fully dissolved.3. Using a marinade injector, pump the brine into the roast in several spots. Be sure to get the needle down to the bone. Submerge the roast into the rest of the brine. Add more water to cover the roast if necessary. Fill a gallon-size zip-seal bag with water and place it on top of the roast to keep the meat under the surface. Brine the roast 1 day per pound.4. When the brining is done, remove the roast and rinse with cold water. Place it on a rack set over a sheet pan, let drain, and pat dry.
The Smoking1. Preheat the smoker to 120 degrees.2. Place the roast on a rack in the smoker, open the vents, and cook without smoke, maintaining 120 degrees, until the roast is dry to the touch, about 1 to 2 hours.3. Add wood chips of your choosing (I prefer alder) to the pan and raise the temperature to 180 degrees. Close the vents halfway and smoke until the ham’s internal temperature reaches 155 degrees. Cooking time will vary depending on a number of factors, including outside temperature, but figure on at least 6 hours–or up to 10 hours for larger roasts.
Terrine

Terrine Photos by Levi Brown, Food styling by Roscoe Betsill
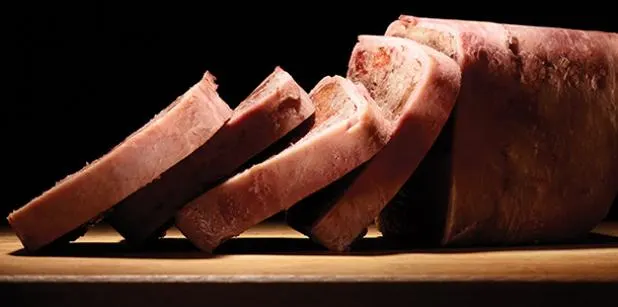
Before we get too far, know that you’ll need a specific piece of kitchenware for this recipe: a terrine mold. JB Prince (jbprince.com) offers several sizes at good prices. Now, on to the food. Of all four recipes, this one has the most ingredients and steps. It’s also one of the most satisfying to make. This is a special dish–flavorful, rich, and an impressive centerpiece. And it’s a great recipe for the tougher cuts of a deer. –C.K.
Ingredients (makes about 24 slices)– 1 lb. venison shoulder or leg, trimmed and cut into 1-inch chunks-14 oz. pork fatback-1½ cups dry Madeira*-1 Tbsp. pate spice (recipe below)-2 Tbsp. kosher salt-2 tsp. freshly ground black pepper-2 cups dried tart cherries, pitted-1 cup brandy-1 Tbsp. butter-1 Tbsp. minced garlic-1 Tbsp. minced shallots-3 large egg whites-½ cup heavy cream-8 to 10 thin slices of ham*Madeira is a fortified Portuguese wine, available at many wine and liquor shops.
Pate Spice-1 tsp. ground cloves-1 tsp. ground nutmeg-1 tsp. ground ginger-1 tsp. ground coriander-1 tsp. ground cinnamon-1 Tbsp. white pepperCombine all the ingredients, mix well, and store in an airtight container.
Directions1. Combine the venison, fatback, Madeira, pate spice, salt, and pepper in a bowl, cover, and refrigerate overnight. Plump the cherries by leaving them in the brandy overnight.2. The next day, place your food-processor blade, grinder tray and head unit, and any bowl you plan to use in the freezer for about a half hour before you continue with the recipe.3. Drain the venison, reserving the liquid. Drain the brandy from the plumped cherries and add to the reserved liquid. In a saute pan, melt the butter and saute the garlic and shallots until soft. Add the reserved liquid. Bring to a simmer, skimming any scum that rises to the surface. Reduce the liquid to a syrupy consistency, being careful not to burn it. Set aside to cool.4. Heat the oven to 300 degrees.5. Make the forcemeat: Grind the venison and fat through a small die into a bowl set in a bowl of ice. Transfer the meat to the food processor, add the egg whites, and blend until smooth. Add the wine reduction and continue to blend until smooth. Transfer to a chilled bowl. With a rubber spatula, fold in the cream until fully incorporated. Fold in the cherries.6. Wrap a spoonful of the forcemeat in Glad wrap and poach in hot water (160 to 170 degrees) until the center reaches 150 degrees. The terrine should taste slightly oversalted. Adjust the seasonings, as necessary.7. Line a 11⁄2-quart terrine mold with plastic wrap, leaving enough overhang on the two long sides to fold over the top of the terrine. Next, line the mold with the slices of ham, again leaving enough overhang all around to cover the top when the mold is filled. Fill the mold with the forcemeat. Fold the ham and then the plastic wrap over the top, and cover the mold with its lid or aluminum foil.8. Place the terrine in a high-sided roasting pan and fill the pan with enough hot water (150 to 160 degrees) to come halfway up the sides of the mold. Put the roasting pan in the oven and bake until an instant-read thermometer inserted into the center of the terrine registers 150 degrees.9. Remove the terrine from the oven, take it out of the water bath, and set a weight of about 2 pounds on top of it. Let the terrine cool to room temperature, then refrigerate overnight, or for up to 1 week.
Bresaola

Bresaola Photos by Levi Brown, Food styling by Roscoe Betsill
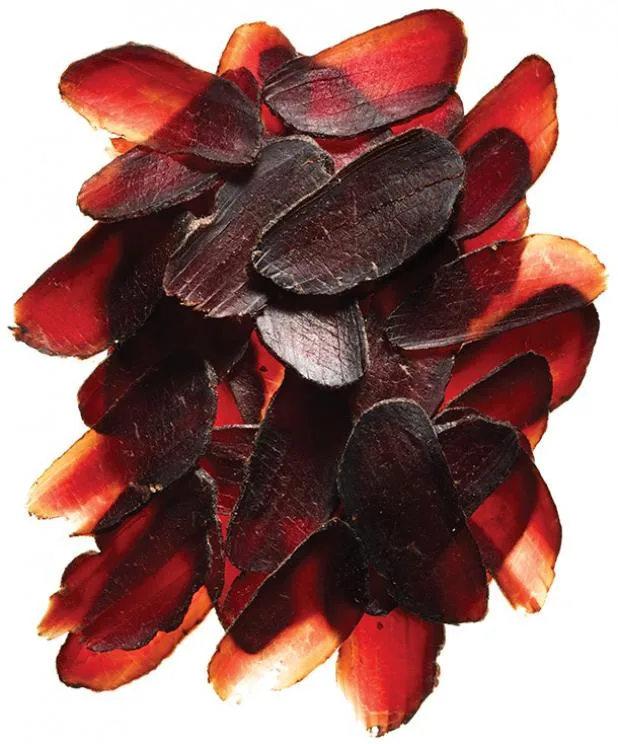
Bresaola is an air-dried meat traditionally made from beef–but we’re using venison. This recipe is the perfect gateway into charcuterie:It requires minimal ingredients, it’s hard to screw up, and the end result is wildly delicious and surprisingly tender. Backstrap is the best cut to use here, but if you’d rather save that for steaks and roasts, fillets from the hindquarters work well, too. The recipe’s cure gives the bresaola a peppery finish, so it’s a natural fit in an arugula salad with fresh Parmesan. It’s also terrific on sandwiches, or with an assortment of cheeses, preserves, and crackers. And it’s not bad all on its own, either. –C.K.
Ingredients-3 lb. venison loin or leg fillets, well trimmed-6 Tbsp. whole black peppercorns-3 Tbsp. salt-3 Tbsp. brown sugar-¾ tsp. coriander seed-6 whole juniper berries-½ tsp. Insta Cure No. 2Special equipment needed: cheesecloth and butcher’s twine
Directions1. In a spice or coffee grinder, coarsely grind the peppercorns, salt, brown sugar, coriander, juniper berries, and Insta Cure. Rub and coat the venison evenly with this mixture and let cure in the refrigerator for 7 days in an airtight bag, turning once a day.2. Rinse the cure off under cold water and pat the venison dry with paper towels. Wrap each piece in two or three layers of cheesecloth, then tie with butcher’s twine: Starting at one end of the venison, tie an overhand knot. Next, tightly wrap the twine around the meat at 2-inch intervals until you reach the end. Secure with another overhand knot and leave a tag end several inches long for hanging. Weigh each piece and add a label with the weight to the tag ends.3. Hang the venison in a refrigerator to dry, ideally at 50 to 60 degrees, with a relative humidity of 60 percent, for 5 to 7 weeks or until it has lost 30 percent of its original weight. The meat will be firm and will have shrunk slightly in the cheesecloth.4. When it’s done, wrap the bresaola in plastic wrap and refrigerate. To serve, slice very thinly against the grain. The bresaola will keep for up to 2 months.
Recipe adapted from Afield: A Chef’s Guide to Preparing and Cooking Wild Game and Fish
by Jesse Griffiths.


