_We may earn revenue from the products available on this page and participate in affiliate programs. Learn more ›
_
I don’t need to tell you how expensive ammo is. So instead, I’ll remind you of something you may already know but probably don’t take full advantage of, and that’s the fact that you can improve your shooting a ton without every firing a shot. All you need to do is incorporate more dry-fire practice into your routine.
Dry fire practice is the act of manipulating or handling firearms without ammunition. It is, for lack of a better explanation, pretending to shoot, with a purpose. Dry-fire practice might be the dead horse you cannot kick enough, and so I’m going to kick it again by breaking down the types of practice all hunters should be doing, and how to do it.

Learn how to get the all-new Field & Stream journal!
Dry-Fire Safety
Before we get into any drills, safety first. There are two keys to safe dry-fire practice. The first is to never have any ammunition in or around the gun, you, or the area where you’re conducting dry fire. The second is to obey the four rules of firearm safety
, as always, even if there is no ammo around:
Always treat every gun as if it were loaded.
Never let the muzzle cover anything you are not willing to destroy.
Keep your finger off the trigger until your sights are on the target.
Always be sure of your target.
Dry-Fire Drill No. 1: Improve Trigger Control
Practice 25 to 30 good trigger pulls for every dry-fire session. Sabastian “Bat” Mann
The secret to shooting is pressing the trigger without disturbing the sight picture. Aside from aiming at the correct spot on an animal, once you’ve learned proper sight picture, you’ve got it; it’s a lesson you’ll never need to learn again. On the other hand, pressing the trigger correctly is something you’ll struggle to master for the rest of your life. This is where dry-fire practice can make a huge difference.
Aim your rifle at a target and practice breaking the trigger while trying to not disrupt the sight picture. This is, of course, difficult because none of us can hold a rifle completely still. What we can do, however, is learn to work with what’s called, “allowable reticle movement” or ARM. ARM is an amount of reticle, red dot, or sight movement on target that will still allow for a hit if you press the trigger correctly. As a general rule, if you cannot keep your sights on an area half the size of your target, you have more than the allowable amount of reticle movement.
Your goal with dry fire is twofold. First, you want to strive to reduce the movement of your sights on the target. And second, you want to perfect your trigger press, so it does not contribute to that movement. It’s something you can improve on by spending only about five minutes each day practicing. Work for 25 to 30 good trigger presses each day, or at least during each dry-fire session.
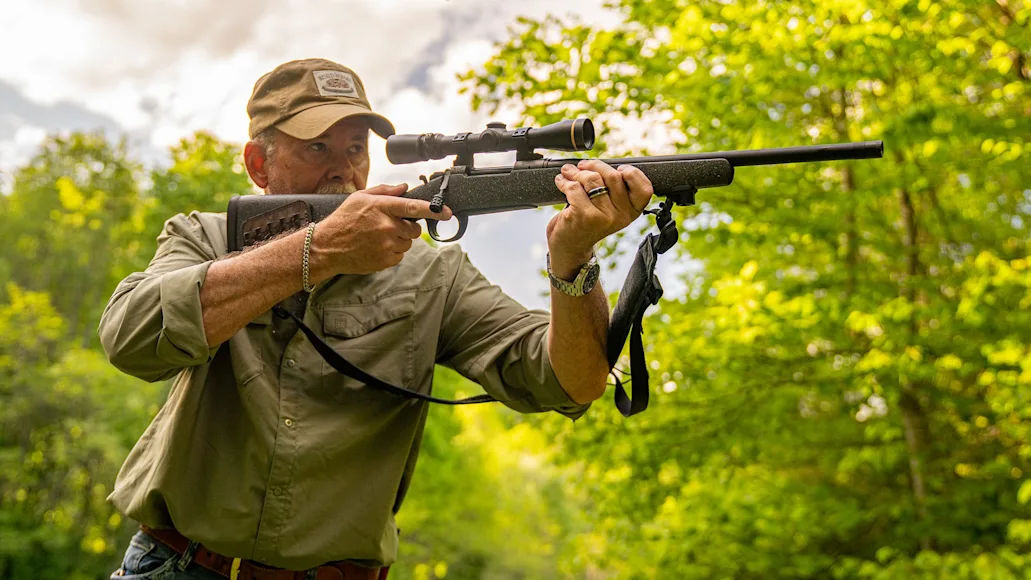
Dry-Fire Drill No. 2: Mount the Rifle Correctly
Keep both eyes open, raise the rifle so it’s level, and then bring it straight back to your shoulder. Sabastian “Bat” Mann
In preparing for a shot, you must bring the rifle to your shoulder and establish the proper interface. When done correctly, when the rifle finds your shoulder and your eye should find the target through the scope or over the sights. Many shooters struggle with this mostly because they don’t do it enough. Just this year while prepping my wife for her second safari, mounting the rifle was the thing we worked on the most during dry practice. In Africa, she never missed an animal and was quick to get on target and shoot.
A key to doing this efficiently is keeping both eyes open. Raise the rifle so it’s level, and then bring it straight back to your shoulder. Keep both eyes on target while doing this. As the rifle is coming to your shoulder, the scope will obscure the target for your shooting eye, but your other eye is still looking at the target. And, since both eyes always look in the same direction, with practice your shooting eye finds the target much faster.
If you have a 3D archery target
where you can safely dry practice, do this about 20 times each day/session. You’ll soon find that you’ll be able to locate the target in your riflescope quicker, and that you’ll also be able to make a trigger press sooner.
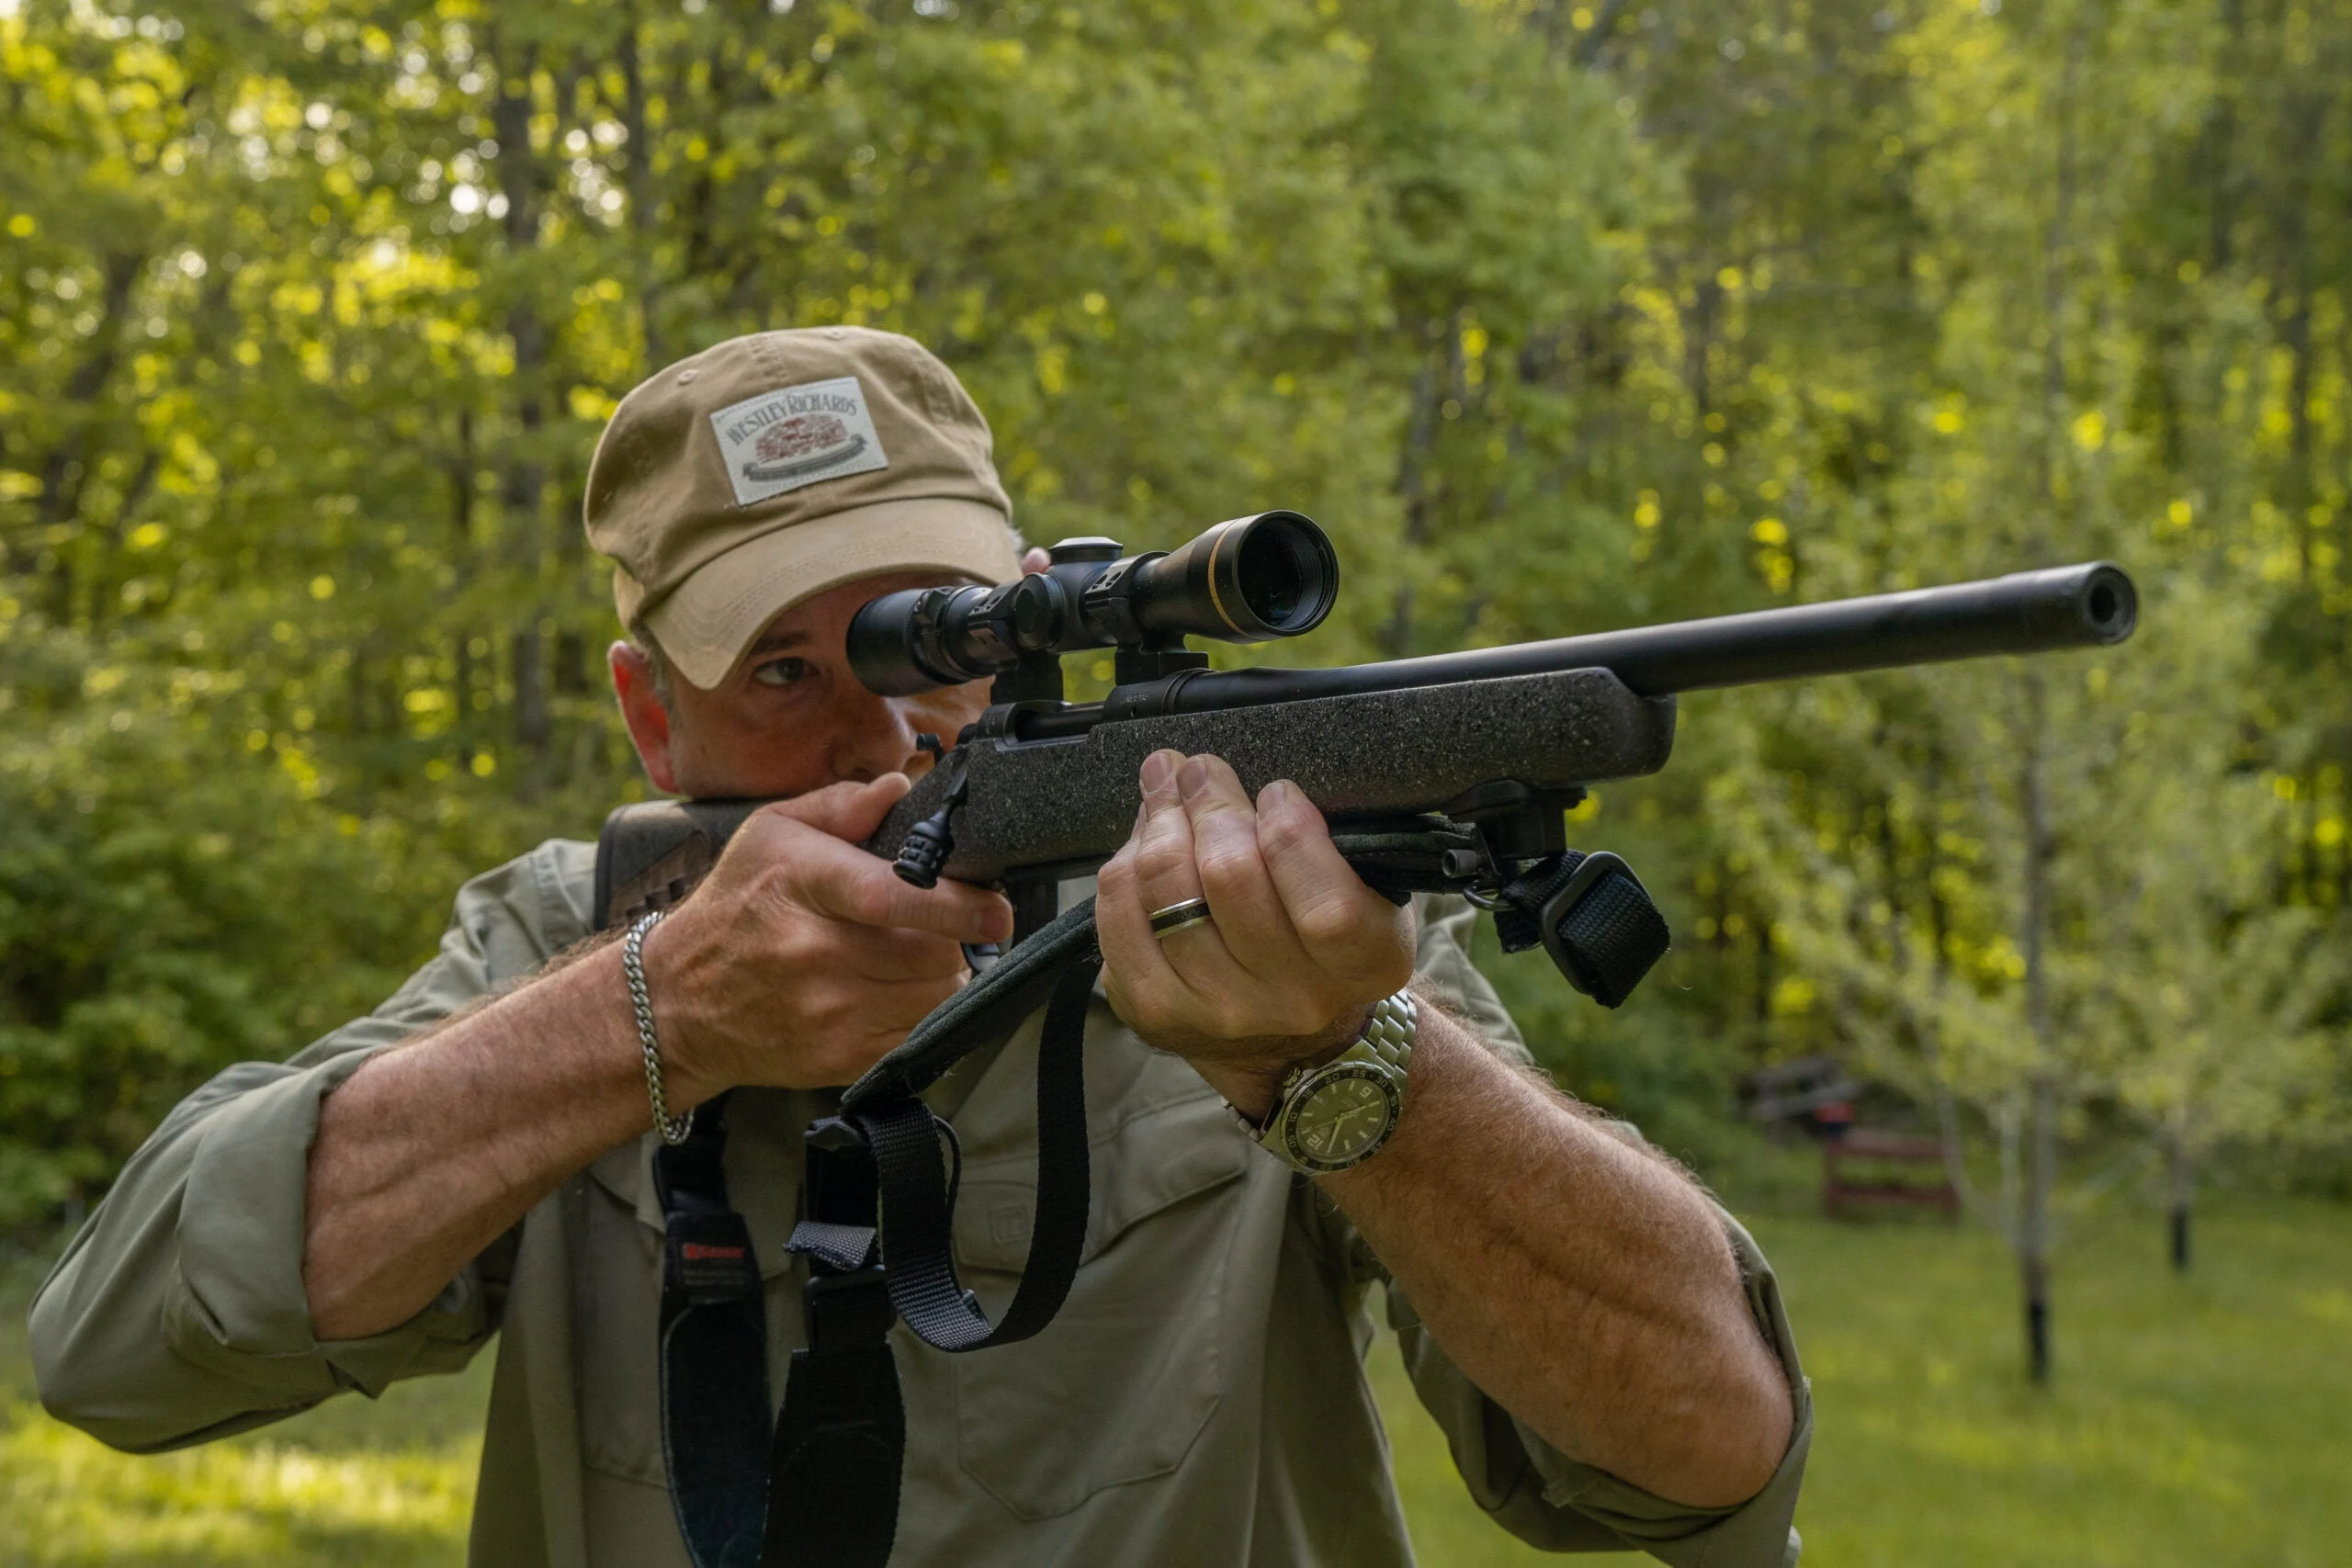
Dry-Fire Drill No. 3: Operate Your Rifle Better

Dry-fire practice cycling the action while the rifle is on your shoulder. It will make for quicker follow-up shots in the field. Sabastian “Bat” Mann
While practicing mounting the rifle there are other things you should be working on—dry. The first is the operation of the safety. Disengage the rifle’s safety as you first begin to mount the rifle, and then engage the safety once you’ve made your “shot.” Practicing this in a dry-fire setting will help you almost instinctively conduct proper safety manipulation when hunting.
The second is the operation of the rifle’s action. After pressing the trigger and following through, immediately cycle the rifle’s action while it’s still on your shoulder. Don’t John Wayne it by lowering the rifle—whether it’s a lever, pump, or bolt action—after the trigger press. Cycle the action and then establish another sight picture, all while keeping the rifle on your shoulder. This is a good process to commit to memory and will prove especially helpful if your first shot results in a bad hit or a miss.
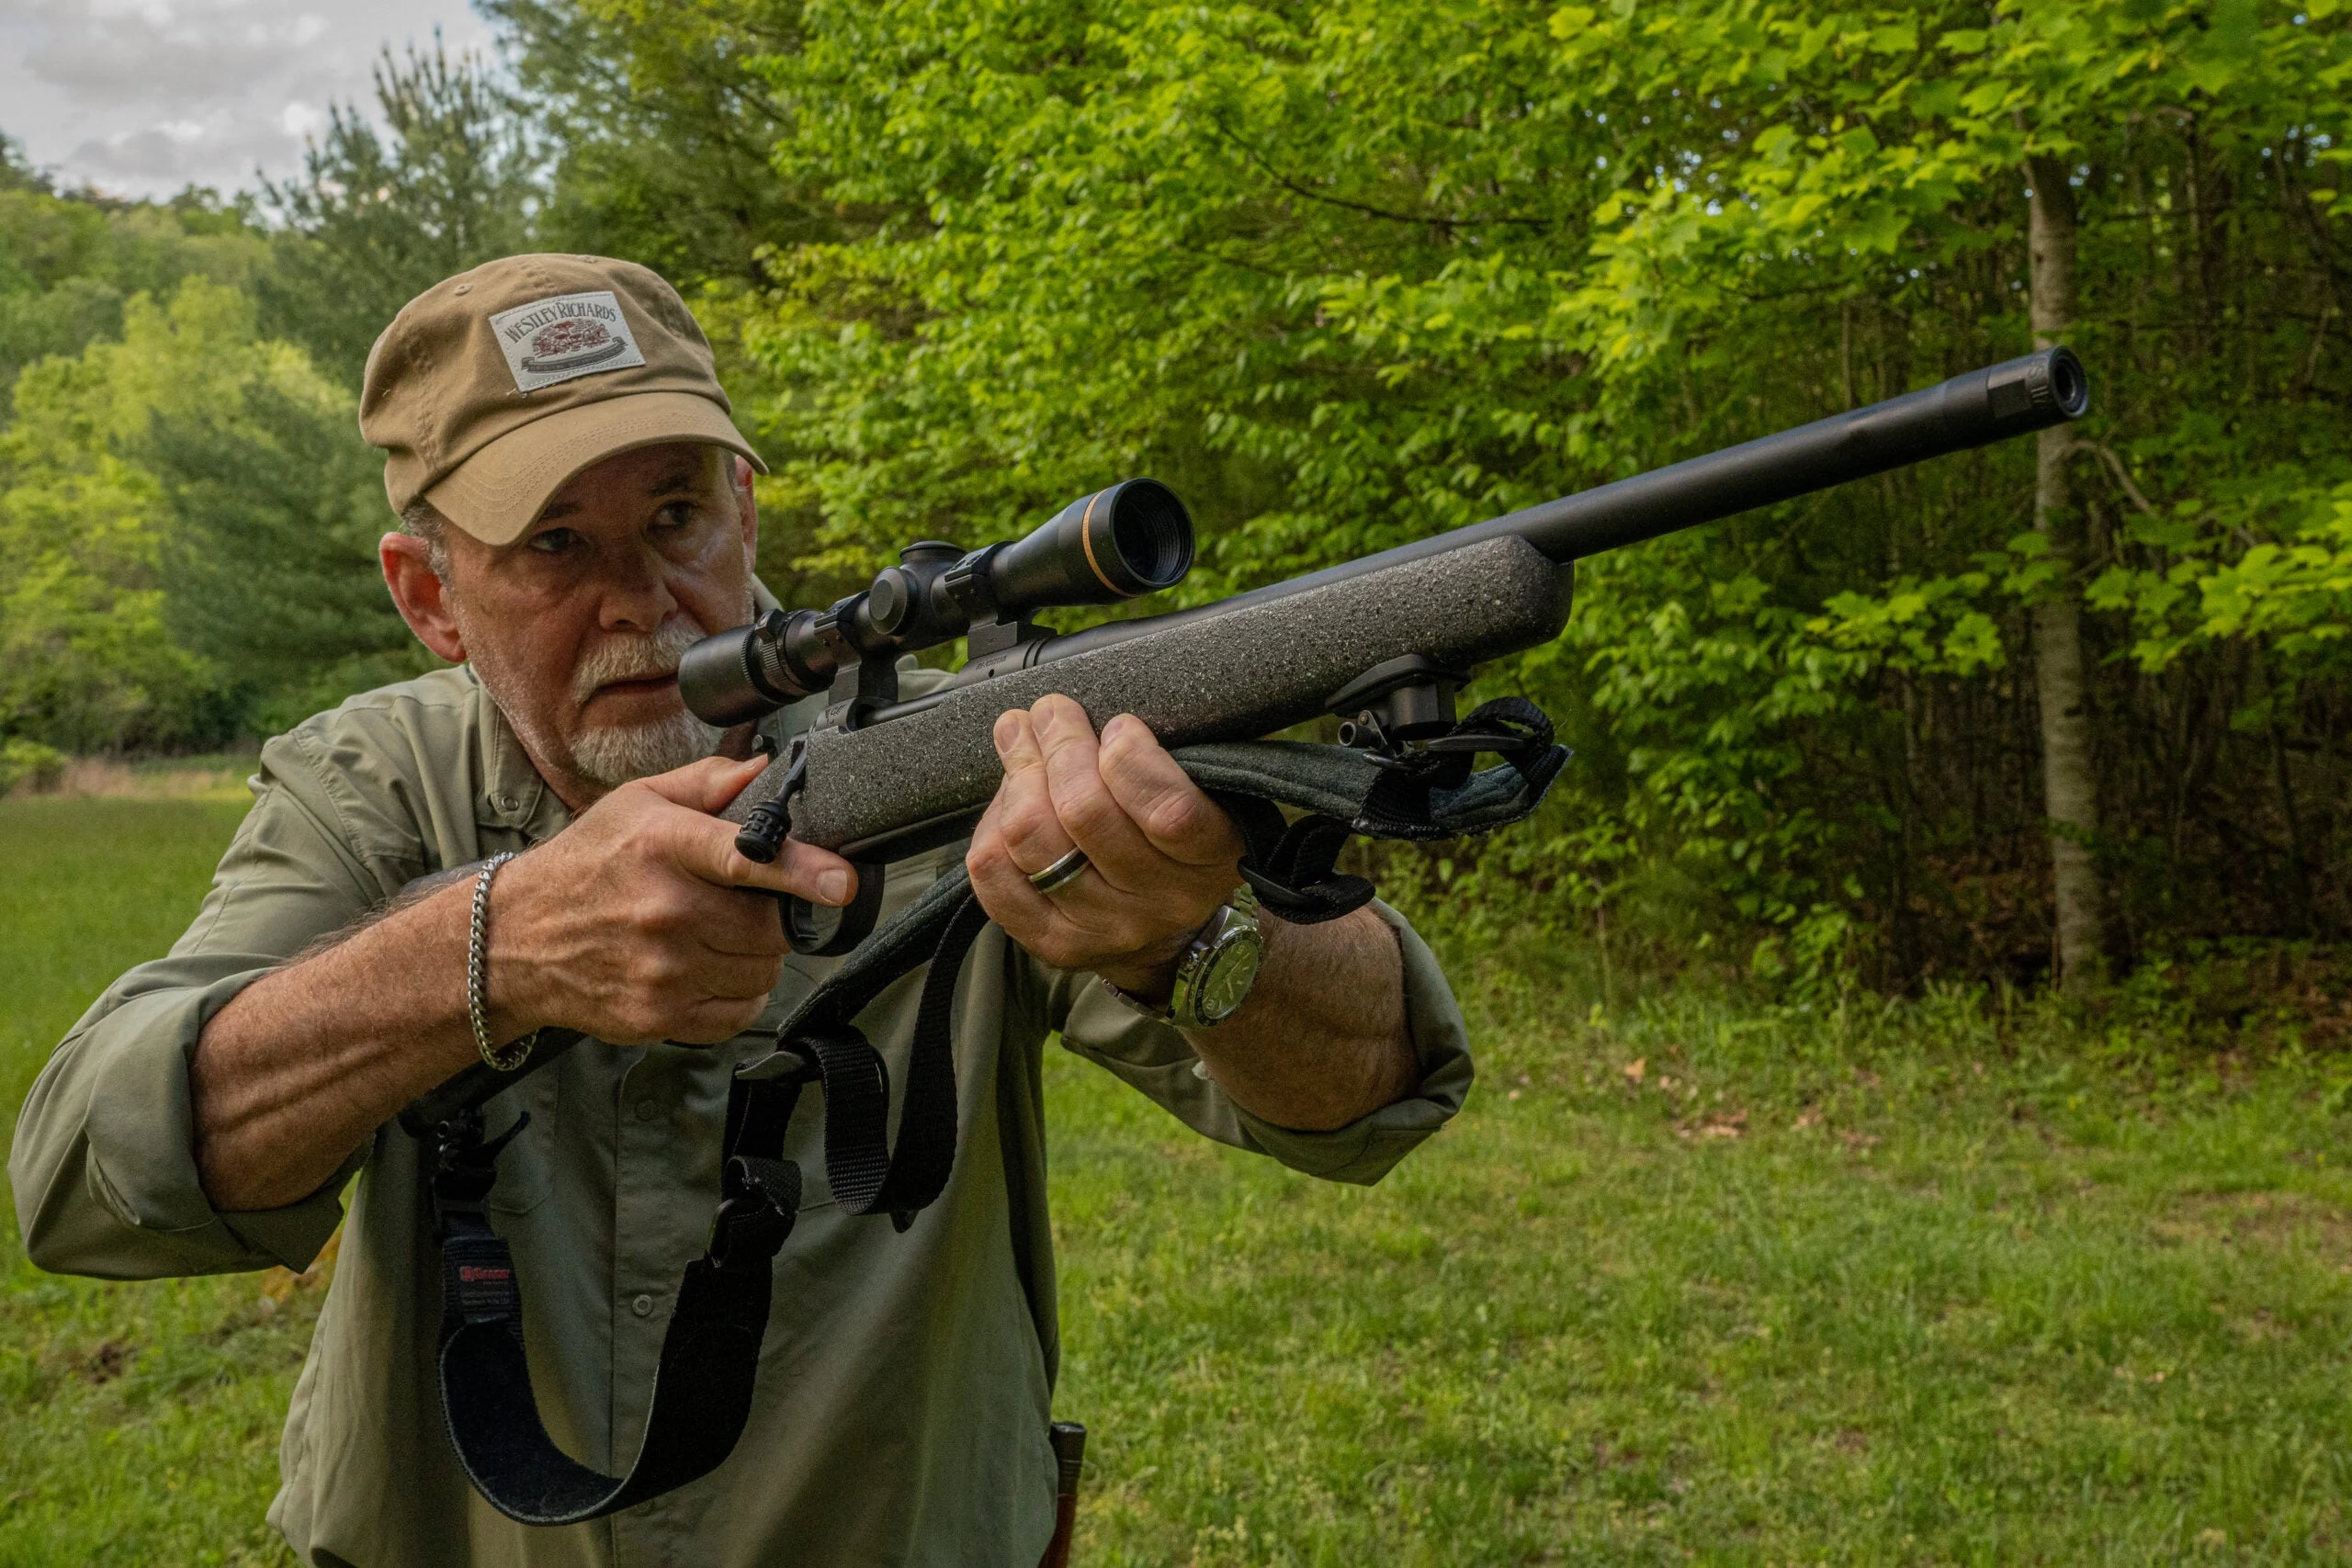
Dry-Fire Drill No. 4: Get From Slung to Shooting

Practice getting your rifle quickly from slung to properly mounted. Sabastian “Bat” Mann
I think one of the most overlooked dry fire training drills is going from the slung to shooting positions. The first year I deer hunted by myself, I missed a chance at a big whitetail buck because I did not get my rifle off my shoulder fast enough. It’s been something I’ve practiced ever since. To dry-fire practice this skill, begin with your rifle slung. Start slow and get the rifle to your shoulder and disengage the safety with economy of motion. Then complete the process with a dry-fire shot, operation of the action, and finally, engagement of the safety.
**Related: The Best Rifle Slings of 2024, Tested and Reviewed
**
Don’t Forget to Practice with Sticks and Slings
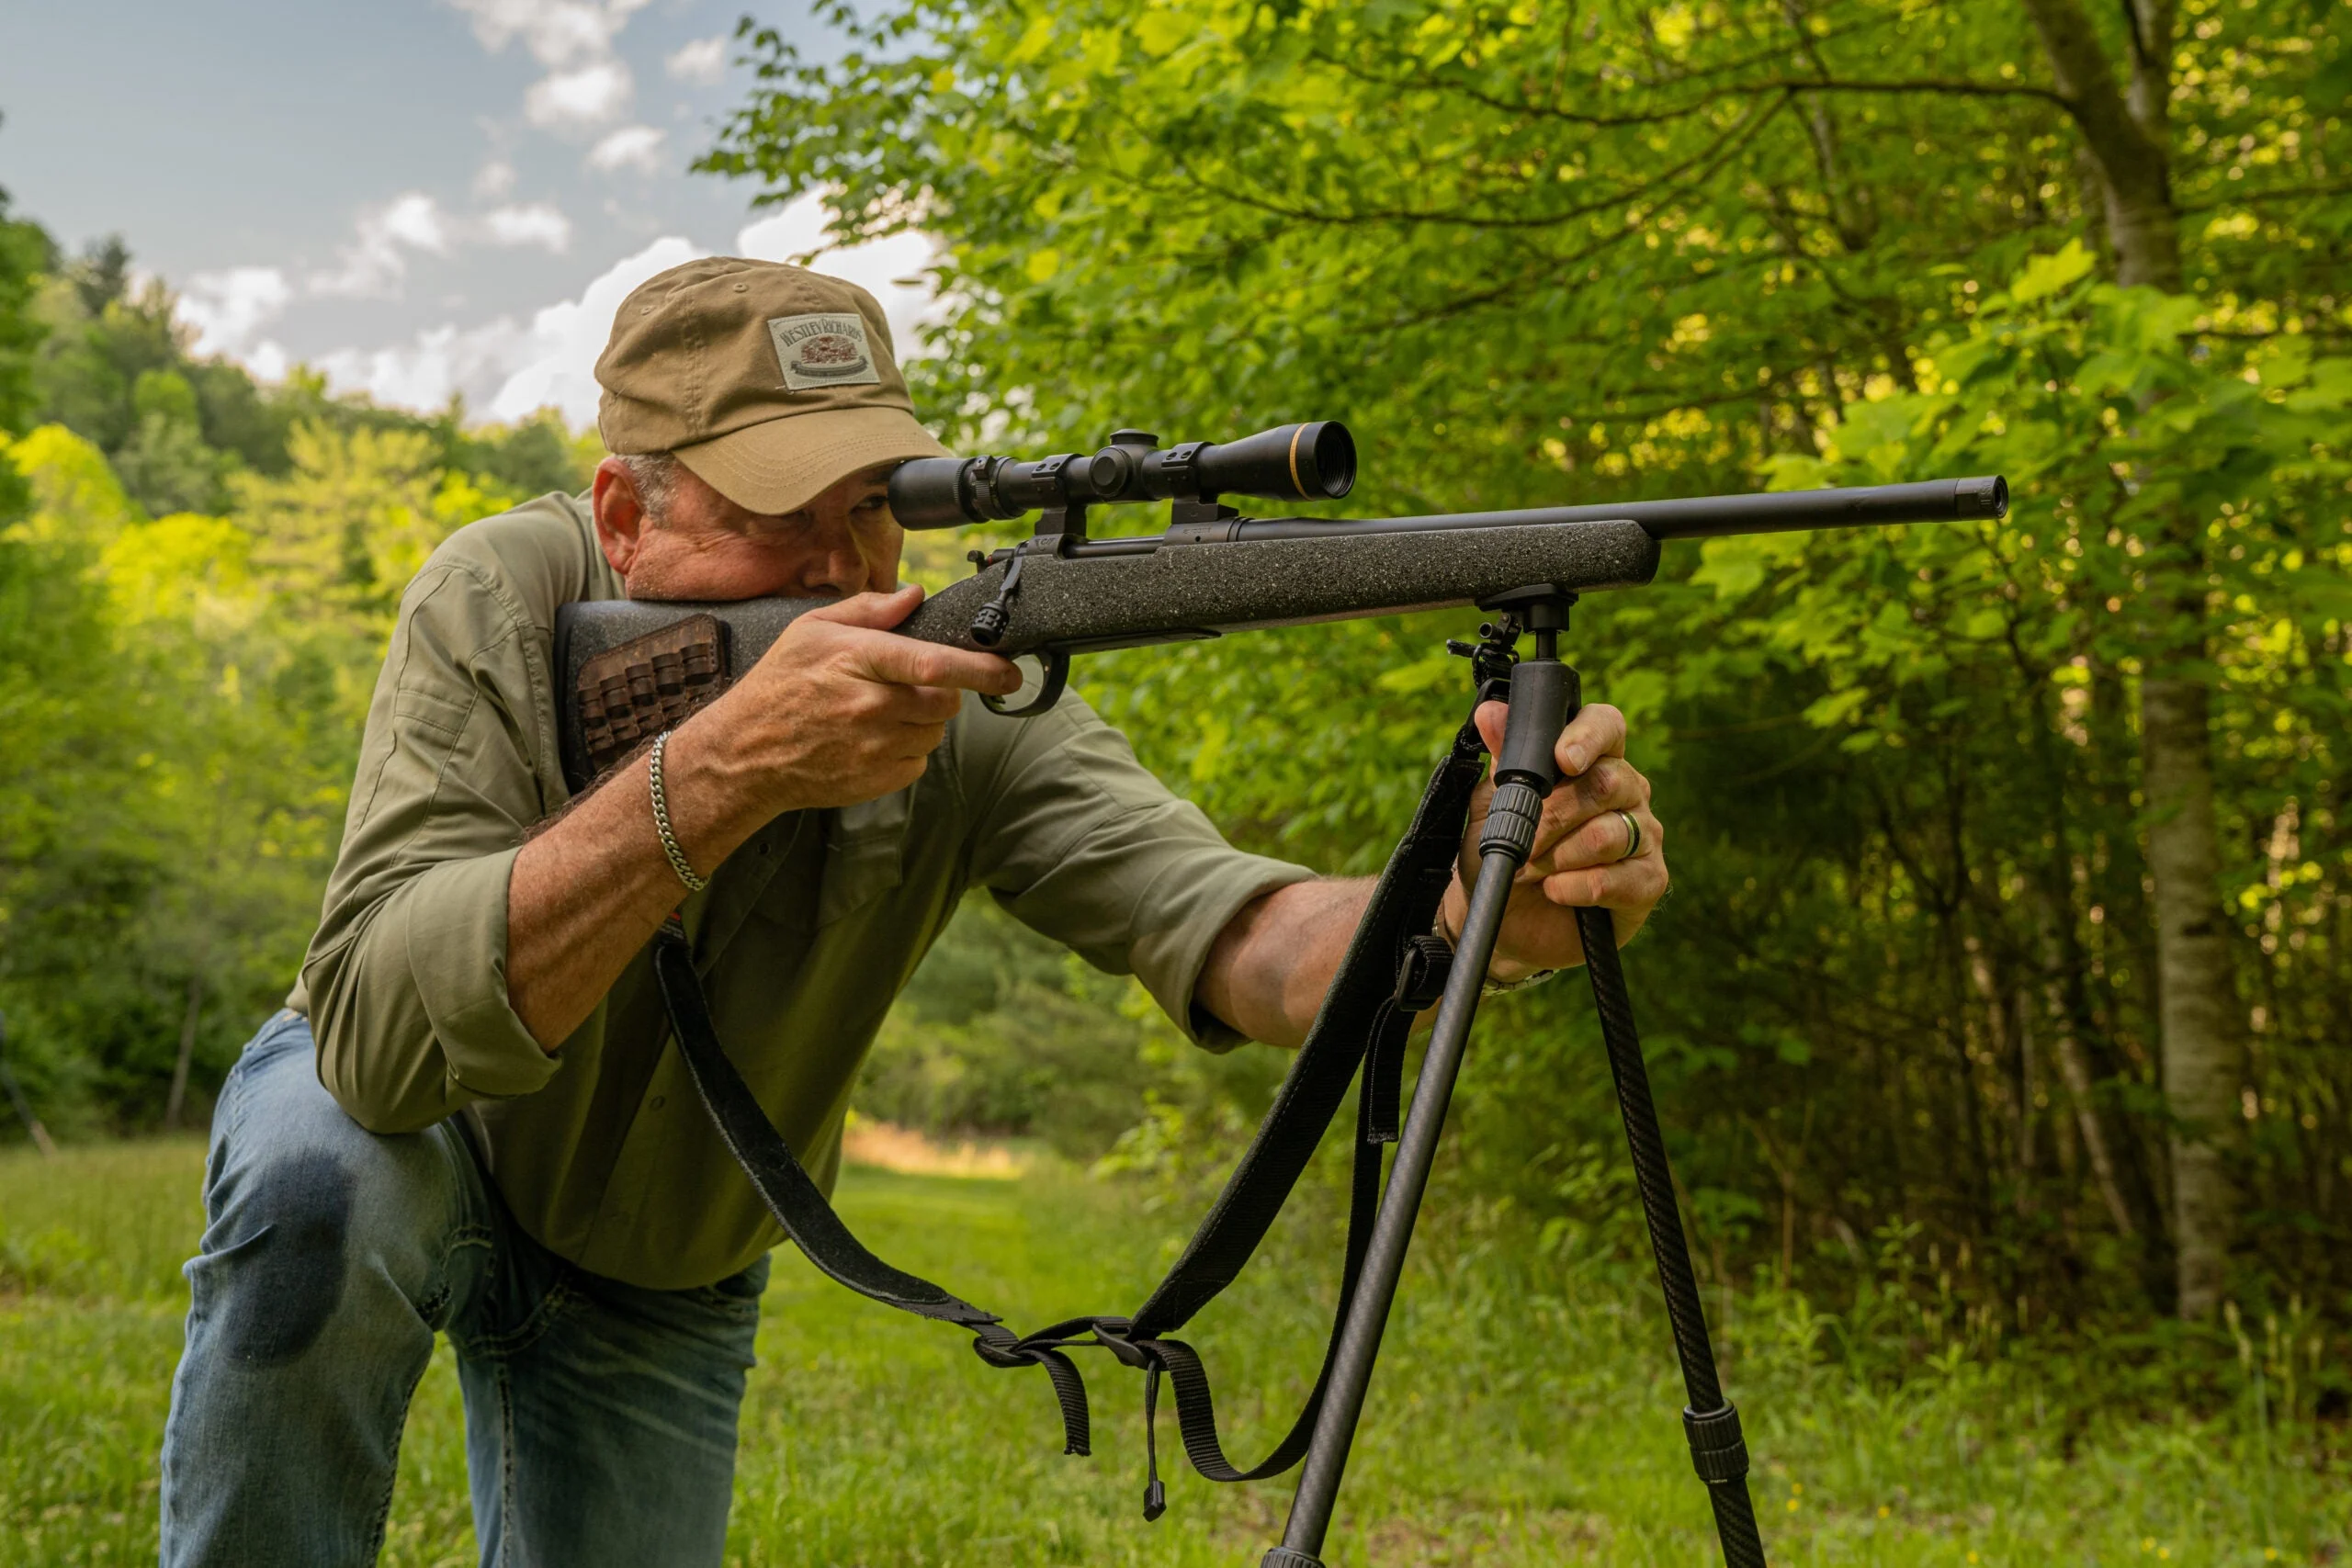
If you’ll hunt with a tripod or a sling, it just makes sense to practice with them. Sabastian “Bat” Mann
On numerous occasions I’ve watched hunters ineffectively attempt to employ shooting sticks or sling up for a shot. Sometimes this has resulted in missed opportunities. It’s not that either sticks or slings are hard to use—both help you shoot better—the problem is the lack of practice adjusting or setting both up. If you use shooting sticks or have a shooting sling, make working with them a routine part of your dry-fire sessions. Pick a target and go from standing and unprepared, to assuming a shooting position and interacting with the shooting sticks or shooting sling. This will make you smoother and more deliberate with both and prevent you from looking like a lost puppy when trying to use either.
Make Dry-Firing a Regular Thing
The best time to dry-fire practice is on a daily or weekly routine. Problem is, most of us don’t have time for that. At an absolute minimum, start about three weeks before your hunt or the beginning of season, and spend five to 10 minutes every day dry-fire practicing. Your trigger press, management of allowable reticle movement, and rifle operation and manipulation skills will improve greatly. Make sure to incorporate shooting sticks and slings if you use them, and fully and purposefully commit to the process. Sometimes hunts come down to seconds and even inches. Leave as little as possible to chance.